


No matter if you are a client who has first heard of the term “wireframe” from a web developer agency or a beginner UX/UI designer learning the ABC of the design process, wireframing is an integral part of the web or app design process that you should be familiar with.
The word “wireframe” may sound like something complicated, but it is a simple thing – a basic sketch or blueprint of a website or app on a piece of paper or a computer. It’s an outline-like drawing that shows where different elements (like buttons, text, and images) should go on the screen.
Designers and developers need this to plan how a digital product will look and function before they start building it, like a rough draft for a website or app design.
Let’s dig deeper and talk about everything you need to know about wireframes.
What is a wireframe for a website?
Let’s say you are developing a website for your business. First you need to design the solution and then develop, test, and launch it. You hire a design and development agency or a designer and/or developer. They hear about your idea and needs, the features you want for your platform, and other factors.
They then research your business, competition, industry, and audience, and come up with a strategy to build the solution. Consult, research, and planning are the first three steps of the development process.
Then comes the “design” phase where you sketch out a few ideas to see how they will interact with the interface. These low fidelity sketches are mainly hand drawn to play with your primary ideas and generate more that were hidden in your mind.
Now it’s time to do wireframing where instead of using a pencil and a piece of paper, you add the details with illustrator, photoshop, or a prototyping tool and create a digital version of the sketches to see how the design might appear visually.
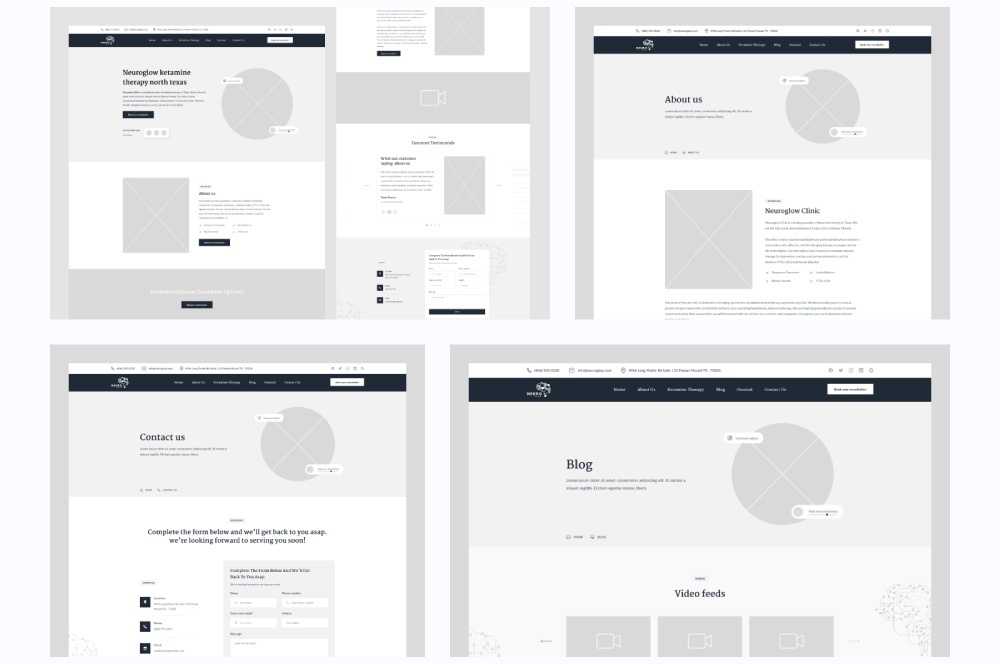
But wireframes are not just the low to mid fidelity digital versions of sketches. More details are added, such as the content area, navigation elements, headers and footers, and more depending on the type of wireframes the design team is creating.
Once you approve a wireframe, mid-to-high fidelity prototypes and mockups are created where more details like colors, typography, graphics, and icons are added to make the interface look and feel as close as possible to the final product.
What is a wireframe not?
As you can see, wireframes are an essential early-stage design tool you need to plan and communicate the structure and functionality of your digital interface. But remember that wireframes are not any of the following things:
High-fidelity design
A wireframe is not a high-fidelity design mockup. It lacks detailed graphics, colors, and specific visual elements, and focuses on layout, structure, and functionality rather than aesthetics.
Final product
A wireframe just provides a blueprint for the interface but doesn’t represent the finished look or functionality of the product.
Interactive prototype
While wireframes can be a starting point for creating interactive prototypes, they are not interactive themselves. Wireframes are static representations, whereas prototypes allow users to click and interact with elements.
Detailed user flow
While wireframes can show the layout and placement of elements, they won’t provide a complete representation of the user flow or navigation between screens. You will do better with user flow diagrams or prototypes.
Mobile or responsive design
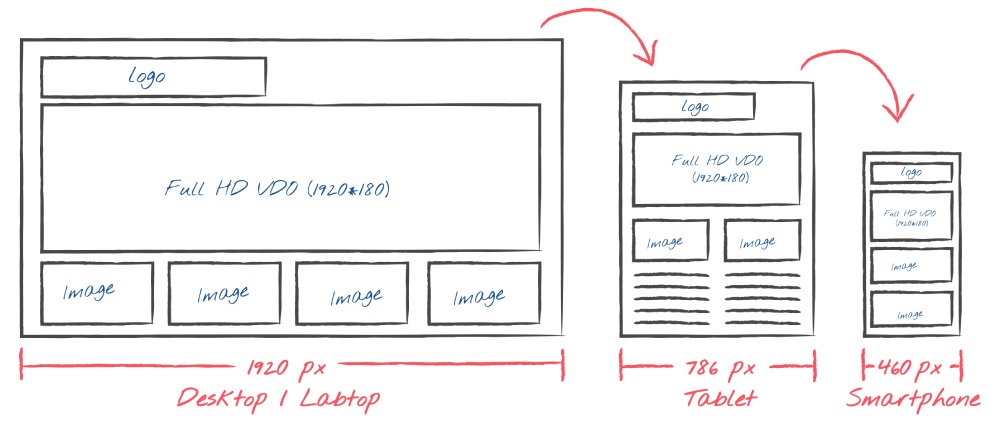
While wireframes indicate a basic responsive layout, they do not provide the detailed specifications needed for responsive design.
Client deliverable
While wireframes are often shared with clients or stakeholders for feedback, they are not the final deliverables for sure.
Why do you need a website wireframe?
Now that you know what is a wireframe in web design, you surely can understand its importance. Without wireframes, you won’t have a clear idea about how the final website design might look like. Also, this is a great way to identify and fix design issues early on so that you can avoid major issues that would be much more difficult and costly to fix afterward.
Visual planning
Since wireframes provide a visual representation of a website’s layout and structure, they serve as a blueprint that your designers and developers can follow when creating the actual website. This is necessary to ensure that everyone involved in the project has a clear understanding of how the final product might look and function.
User Experience (UX) Design
This is an effective way to have a first look on the user experience. By sketching out the basic elements and layout of a webpage, you can do early testing and optimize the site’s usability and functionality. You can also identify and solve potential issues before investing significant time and resources into development.
Content Organization
You can place different content elements like text, images, videos, and buttons to ensure that content is logically organized and prioritized. This is necessary for users to find what they’re looking for and navigate your site efficiently.
Communication
Wireframes serve as a communication tool between different stakeholders in a web development project, including designers, developers, clients, and project managers. You get to have a common visual reference point that helps in discussions and decision-making related to the design and functionality of your website.
Consistency
Wireframes also help establish a consistent visual and structural framework to create a cohesive and professional-looking website that aligns with your brand’s identity in every aspect.
Types of wireframes
Based on the necessary of your web development project, wireframes can be of three types:
| Type of Wireframe | Level of Detail | Purpose |
| Low-fidelity wireframe | Simple shapes and text | Brainstorming, getting feedback |
| Mid-fidelity wireframe | Basic colors, images, and annotations | Usability testing |
| High-fidelity wireframe | Actual colors, images, typography, animations, and interactions | Creating a prototype |
1. Low fidelity
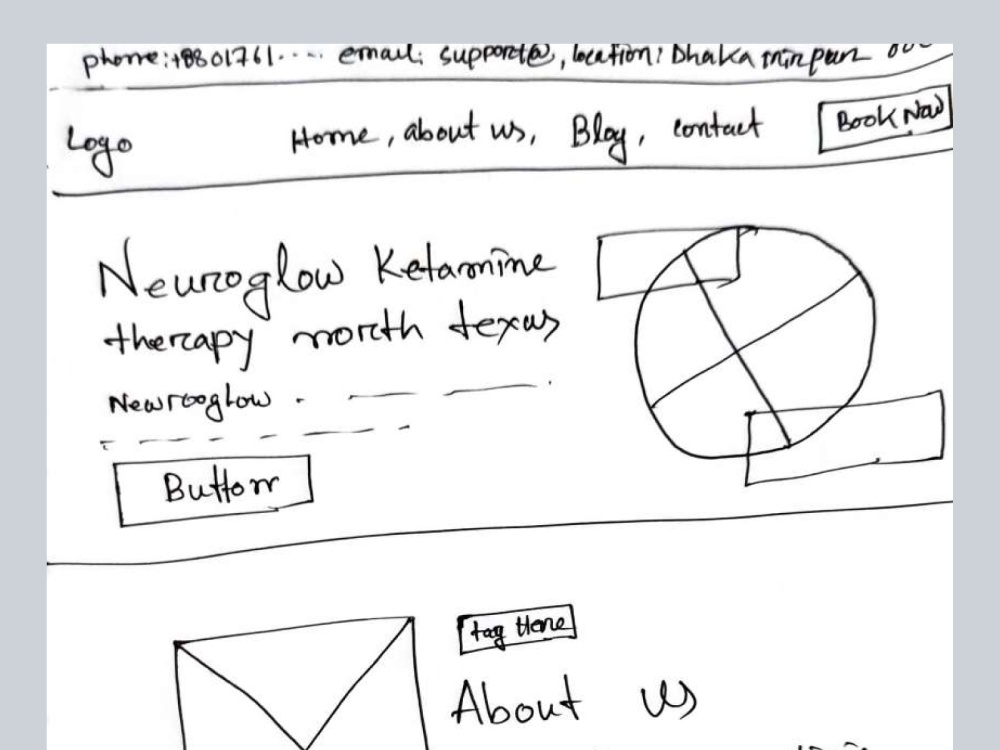
These are basic, simplified sketches that are quick to create and focus on the layout and placement of elements e.g. simple shapes, lines, and placeholders for content.
2. Mid fidelity
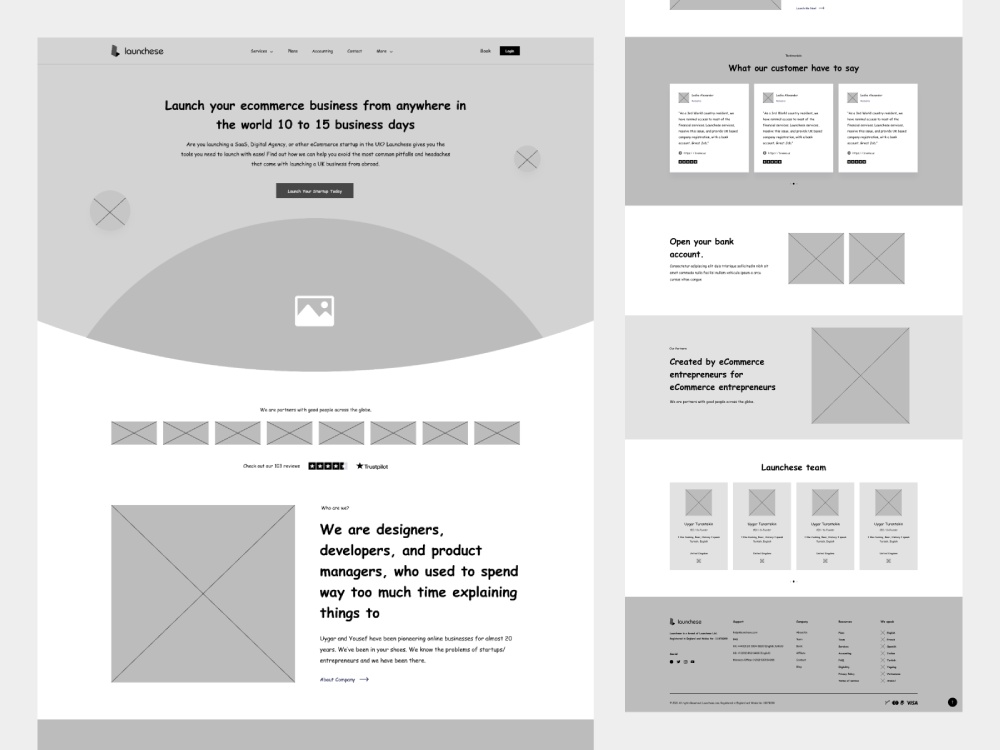
They are a more detailed representation of the layout and content, and usually include placeholders for images, text, and basic visual elements. There is a balance between simplicity and detail that makes them suitable for discussing and refining the design concept.
3. High fidelity
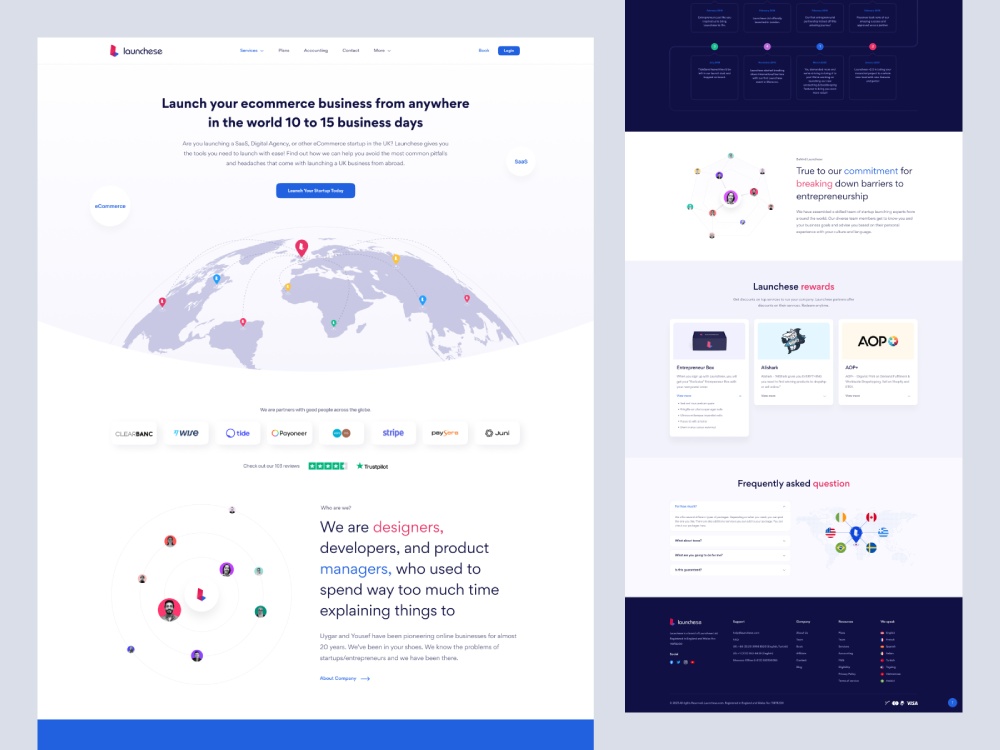
High-fidelity wireframes closely resemble the final design with realistic content, fonts, colors, and some even incorporate some interactivity.
Wireframe vs Prototype vs Mockup
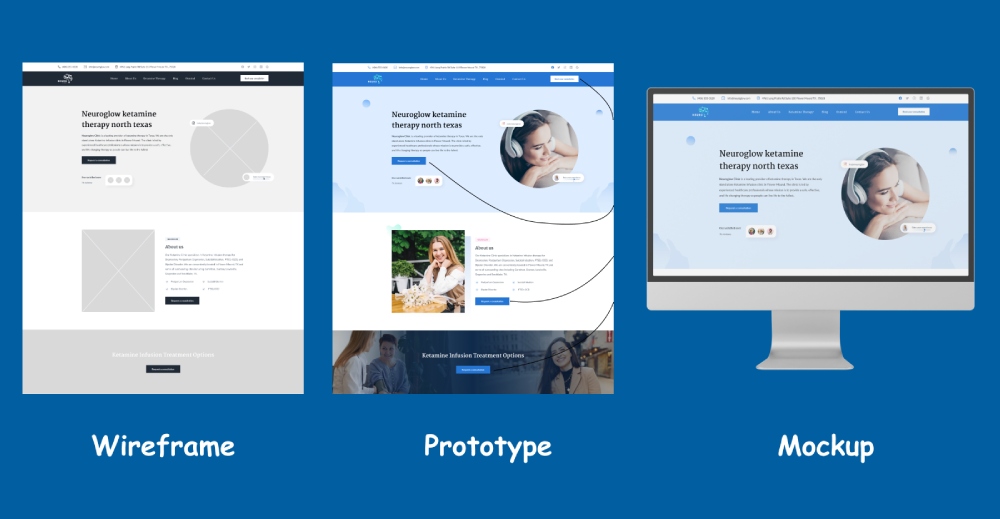
Think of wireframes as the basic blueprint, prototypes as the working model, and mockups as the detailed visual representation. During the design process, these tools are used in sequential order to ensure that the final digital product not only looks good but also functions well and provides a great user experience.
Wireframe
A wireframe is like the basic skeleton of your website. It’s a simple, low-fidelity, and often black-and-white representation of the layout. You can consider a wireframe as a blueprint for a house, which outlines the structure without the intricate details.
Purpose: to help designers and stakeholders understand the placement of elements on a page or a screen.
Design Elements: basic shapes, lines, and placeholders for content like text and images.
Interactivity: Static without any interactions or functionality – more about the “where” and not the “how.”
Prototype
A prototype is like a working model of your website. It’s more detailed than a wireframe and shows how different parts of the site will function. It’s like a model house where you can walk inside and experience how it feels.
Purpose: to test and validate the user experience (UX) and functionality before building the final version.
Design Elements: more visual elements with some interactive features like clickable buttons and basic transitions.
Interactivity: simulating user interactions, such as clicking on buttons, navigating between screens, and performing basic tasks.
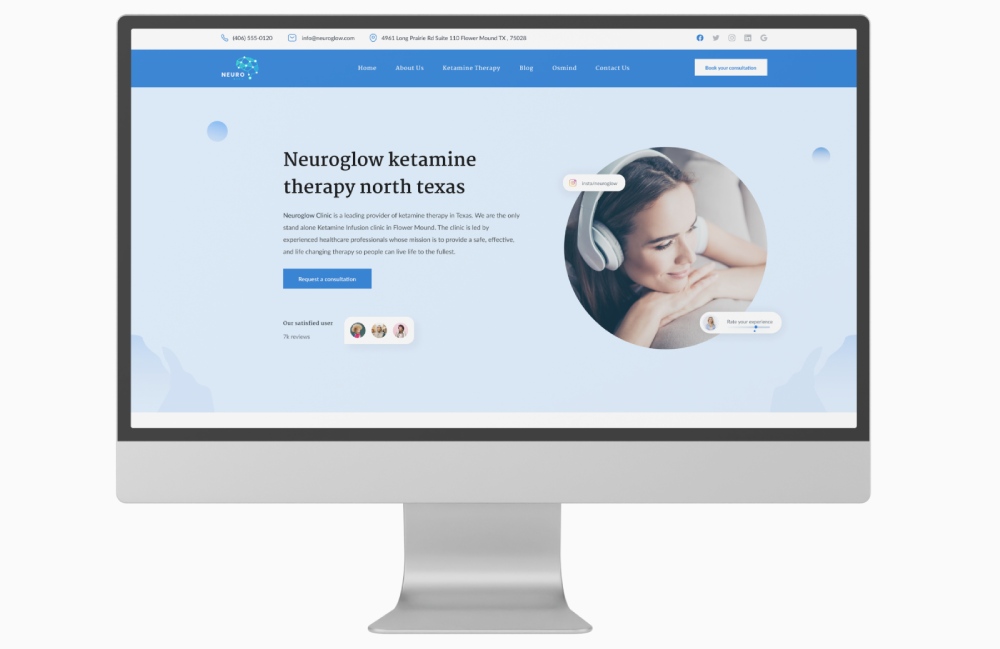
Mockup
A mockup is like a highly detailed visual representation of the website. It’s like a beautifully furnished model house that gives you a precise idea of how the final product will look.
Purpose: to provide a realistic preview of the final product’s aesthetics with the visual design, including colors, typography, and images,
Design Elements: high-fidelity with the actual content, such as real text and images for a realistic appearance.
Interactivity: static without interactive features – mainly for showcasing the visual design
Most popular wireframing tools in 2023
1. Sketch

Sketch is a vector-based design tool for macOS known for its simplicity and powerful plugins. It’s favored by many UI/UX designers for wireframing and interface design.
Pros:
- Excellent for creating high-fidelity wireframes and UI designs
- Extensive library of plugins and resources
- Strong vector editing capabilities
Cons:
- Available only for macOS
- Requires separate plugins for prototyping
2. Adobe XD

Adobe XD is part of the Adobe Creative Cloud suite and offers a comprehensive set of design and prototyping tools. It’s suitable for both wireframing and high-fidelity design work.
Pros:
- Part of the Adobe Creative Cloud that facilitates seamless integration with other Adobe products
- Supports both wireframing and high-fidelity design
- Robust prototyping features
Cons:
- Collaboration features are less robust compared to some cloud-based tools
3. Figma

Figma is a cloud-based design and prototyping tool that allows real-time collaboration between team members. It’s platform-agnostic and accessible through a web browser.
Pros:
- Web-based for real-time collaboration
- Strong vector editing and design capabilities
- Excellent for collaborative design and prototyping
Cons:
- Limited offline functionality without an internet connection
4. Axure RP
Axure RP is a prototyping tool many designers prefer for its robust interaction and animation capabilities. You can use it for creating highly interactive and dynamic wireframes.
Pros:
- Powerful interaction and animation capabilities
- Ideal for creating highly interactive and dynamic wireframes and prototypes
- Supports conditional logic and variables
Cons:
- Learning curve can be steep for beginners
- May be overkill for simple wireframing tasks
5. InVision

InVision offers a range of design and prototyping tools, including InVision Studio and InVision Cloud. Many enjoy its collaborative features and integration with other design tools.
Pros:
- Excellent for creating interactive prototypes
- Strong collaboration and feedback features
- Integrates well with other design tools
Cons:
- Focused more on prototyping than wireframing
- Free plan limitations
6. Moqups

Moqups is an online wireframing and prototyping tool that offers a wide range of pre-built templates and elements for creating wireframes.
Pros:
- Web-based with real-time collaboration
- Extensive library of pre-built elements and templates
- Suitable for wireframing and prototyping
Cons:
- Lacks some advanced design features
7. Proto.io

Proto.io is another web-based prototyping tool that you can try to create interactive wireframes and prototypes without coding.
Pros:
- Web-based and easy to use
- Supports interactive wireframes and prototypes
- Collaboration features for team projects
Cons:
- Limited vector editing capabilities compared to other tools
- Pricing can be relatively high for some users
How to wireframe your website?
Here is a quick guide to make your very first website wireframe. We have kept it short and simple so you can get it right without too much hesitation.
Do your research

Don’t forget the fact that wireframing is not the first step in the design process. You have to spend some time understanding the target audience, the primary message or content you want to convey, and the desired user actions (e.g., sign up, purchase, contact).
You can also visit competitor websites or platforms like Behance or Dribble to get design inspirations and ideas. But don’t just fully copy a design that you have liked a lot because every business has its unique features to offer, and you shouldn’t miss out on the opportunity to separate yourself from the competition if you can with the latest trends and innovative ideas.
Create some rough sketches
This is where the fun begins! Get a pencil and some pieces of paper. First write down the information you want on the page, what it is about, and how much of it there will be. For instance, if it’s the homepage of a blog, there will be a header, footer, bio, titles, and photos, a search bar, social media links, a newsletter signup, and other necessary sections.
Keep this info in front of you so you don’t forget any of the details. Now get another piece of paper and start generating ideas. Again, remember that these initial sketches don’t need to be detailed; it’s just a way to get your ideas down on paper.
Once you have your first sketch, don’t stop there. Create more sketches with new ideas (preferably for each section) and keep drawing till you run out of new concepts. By the time you are done, you will be surprised at all the ideas that were hidden in your mind!
Now that you have several sketches in front of you with different design ideas, mark the most favorite design for each section and create a final sketch with all of your most-favorite sections. The sketching part is done and it’s time to move on to the next stage.
Pick a wireframing tool
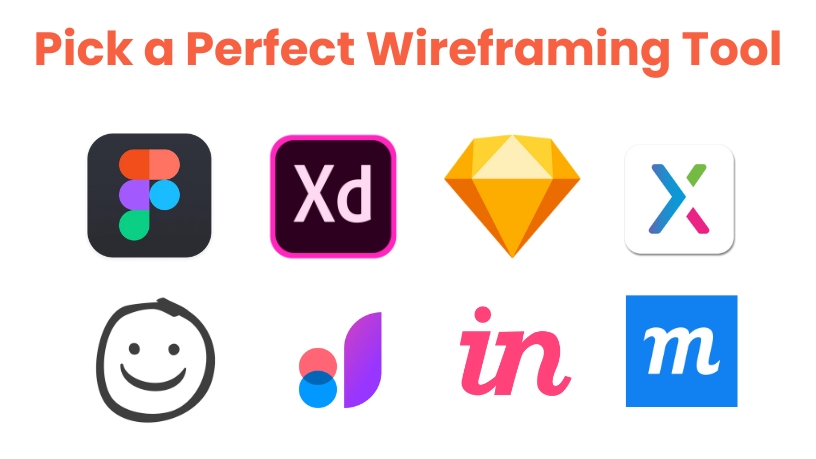
First select the wireframing tool you’re comfortable with. The most popular ones are Adobe XD, Sketch, Figma, and Balsamiq that we mentioned above with their advantages and disadvantages. We personally prefer Figma though you may have a different preference for one reason or another.
Tip: Remember to keep things gray so they don’t look like a complete design. You want to keep your focus on the structure; not on how the complete design might look like.
Copy the sketch to the wireframing tool or, in other words, create a digital version of the sketch. We recommend that you use placeholder texts instead of Lorem Ipsum so you get more context about the kind of content there will be. This will also help with getting better feedback.
Create a mockup
The wireframing part is done! Now you can create a mockup to have a better look at the visual and functional aspects of the app. You can then share your mockup with your team members, clients, or potential users to gather feedback and use it to make improvements and iterate on your design.
Mistakes to avoid when creating wireframes
Although wireframing is supposed to be a quick and simple way to play with your design ideas, you still have to know how to do it right. After all, it enables designers to quickly iterate and make changes to the basic layout and functionality before they go into the detailed design or development phases.
Skipping the planning stage
If you jump straight into wireframing without a clear understanding of the project goals, user needs, and requirements, this may lead to confusion and wasted effort. Always start with thorough research and planning.
Being Inflexible
Wireframes are meant to be a starting point, not a rigid blueprint set in stone. Be open to making changes and adjustments as the project progresses and new insights emerge.
Overcomplicating
Wireframes should be simple and focused on the core structure and functionality of your design. Avoid adding unnecessary details or visual elements that belong in the later design stages.
Overcrowding the Layout
Avoid cramming too much information into a single wireframe. Try to keep the layouts clean and spacious to improve readability.
Copying existing designs
While it’s okay to draw inspiration from existing designs, avoid directly copying them. Wireframes should be tailored to your project’s unique needs.
Neglecting feedback
Don’t work in isolation. Seek feedback from colleagues, clients, and users to refine your wireframes and catch potential issues early.
Lacking clear CTAs
Wireframes should clearly indicate where important actions (e.g., buttons, links) are located. If the Call to Actions (CTAs) are unclear, the users may struggle to navigate the final design.
Wrapping it up
What is a wireframe for a website? Now that you know everything about wireframing, we hope you will have an intuitive, interactive, user-friendly, and aesthetically appealing digital solution that will be able to ensure maximum ROI for your business.
